In the example above, the message indicates there is one internal account not linked, and 10 expense accounts which are not linked. Accounts that are not linked are not included on the Annual Report.
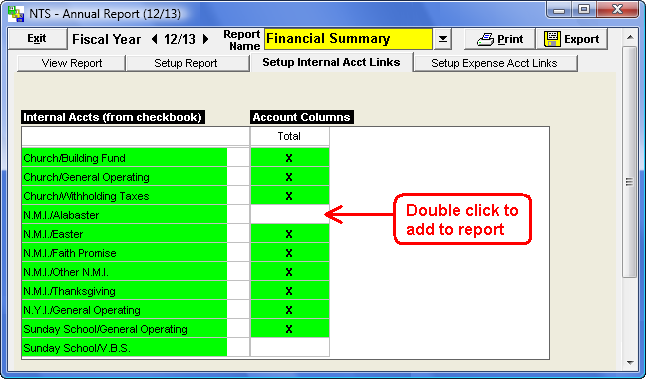
- At the top of the Annual Report screen, click on Setup Internal Account links. If this tab is not visible, click the Setup Report first.
- This screen will show a grid with a list of all the internal accounts. Double-click in the Total column to add an account to the report. Optionally, click in the total column and press the space bar. As a general rule, all accounts should be linked to the report.
- To remove a link, double click on the 'X' for that account or select the box and press the space bar to remove the link.
- To save the changes, click the View Report button.
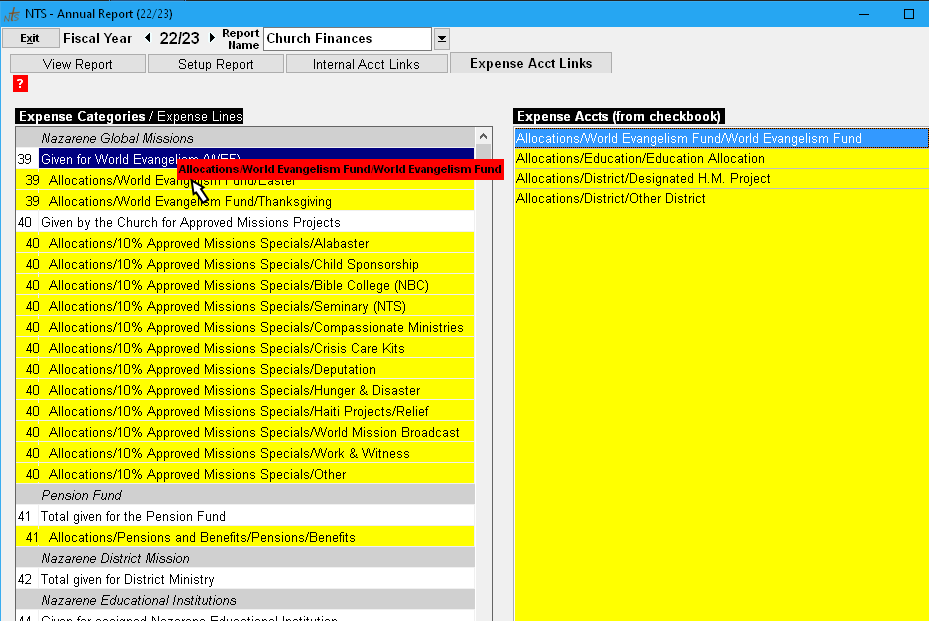
- At the top of the Annual Report screen, click Setup Expense Acct Links tab.
There are two lists on the Setup Expense Accounts page. On the LEFT side is a listing of the Annual Report Expense line items(white rows) and the corresponding Linked Checkbook Expense Accounts(yellow rows). The number or code assigned to each line is visible on each line.On the RIGHT side of the screen are the UNLINKED Checkbook Expense Accounts(yellow).
-
To link a Checkbook Expense Account to a Annual Report line, Click and drag the account from
the right window and drop it on the applicable Annual Report line on the left window.(white rows)
After dropping the account, the code for the Annual Report line will appear on the line. This
verifies that the account is correctly linked. See the illustration below.
Note: To quickly link subsequent Checkbook Expense Accounts to the same Annual Report line, press the SPACE BAR and the selected Checkbook account will link.
- If the account is dropped in the wrong place, click and drag the account up or down the list or drag back to the right window.
- To save the changes, click the View Report tab.