Payees can be added either on the Setup screen or while Posting transactions. For information on adding Payees while posting, see the link below.
- From the Checkbook screen, click Setup, then Payee List.
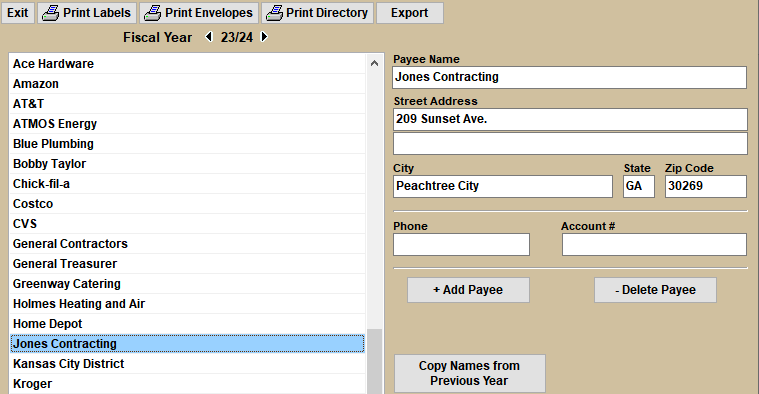
- Click + Add Payee.
- Fill in Name, Address, etc. Press ENTER on keyboard after each field entry.
- Press Save Payee button (if visible) after changes are completed.
- To Edit information, Click the Payee Name on the Left side of window, then edit the information on the right side.
- To Delete a Payee, Click the Payee Name on the Left side of window, then click the "Delete Payee" button. The Payee will only be deleted from the Fiscal year indicated above the list.
- To Delete UNUSED/OBSOLETE Payees:
- Click the "Find Payees with No Activity" button.
- Payees that have NOT been used in either the Selected or Previous Year will be hilited in RED.
- To only hilite the Payees that have not been used in the Selected Fiscal Year, click with the RIGHT mouse button.
- To De-Select a Payee, Double-Click the Name in the List
- To Delete ALL Selected (hilited in Red) Payees, Click the DELETE PAYEE button with the RIGHT Mouse button.
- To Un-Hilite the Names: Click the "Find Payees with No Activity" button again.
- To Copy missing Payees from the prior year, click the Copy Names from Previous Year. button at the bottom of the screen.
- To Merge Duplicate Payees:
- Click the Merge 2 Payees button. (right-side of window)
- Click OK to acknowledge the Instructions Pop-up box.
- Double-Click the Payee NAME in the List that you want to KEEP. This Name will appear GREEN.
- Double-Click the Payee NAME in the list that will MERGE with the one in GREEN. This Name will appear RED.
- Click OK on the Confirmation message.
- To Export the list to a CSV file, click the Export button at the top of the screen.
See the link below for instructions on editing a Payee's information from the transaction register.
For more information see: